The UIndy Virtual Private Network (VPN) allows you to securely connect to the UIndy network from off campus. The VPN is required to use some UIndy services from off campus. UIndy has partnered with Duo Security to provide MFA for our UIndy VPN.
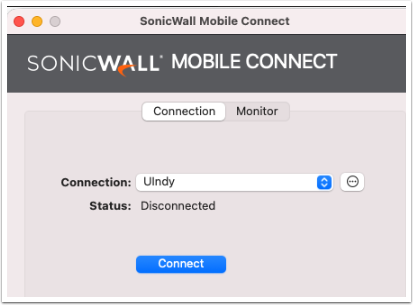
NetExtender is the VPN client for windows machines and Mobile Connect is the VPN client for MacOS machines.
Download and install from Windows
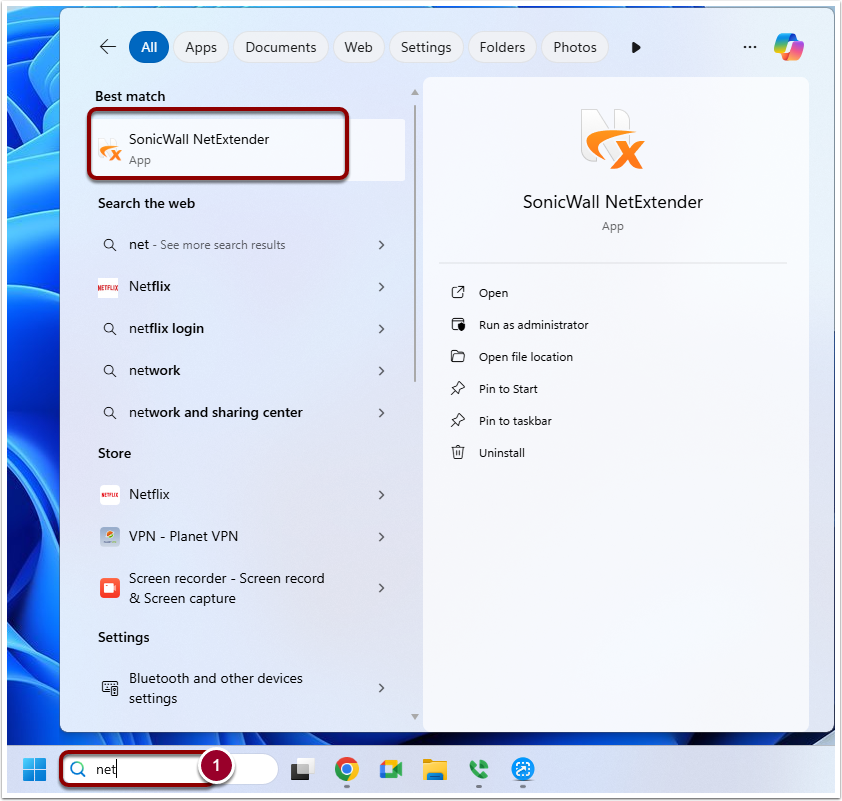
NetExtender is the VPN client for windows machines. MacOS and Windows machines deployed by UIndyIT should already have the client installed. To see if it's installed:
- Click on the search bar and enter NetExtender. If nothing appears, proceed to Install the NetExtender Client. If NetExtender does appear, skip to Add Connection.
Install the NetExtender Client
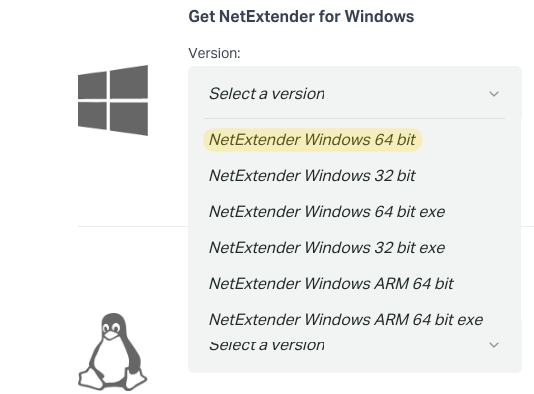
- Navigate to https://www.sonicwall.com/products/remote-access/vpn-clients.
Scroll down to Get NetExtender for Windows. From the dropdown menu for version select NetExtender Windows 64 bit.
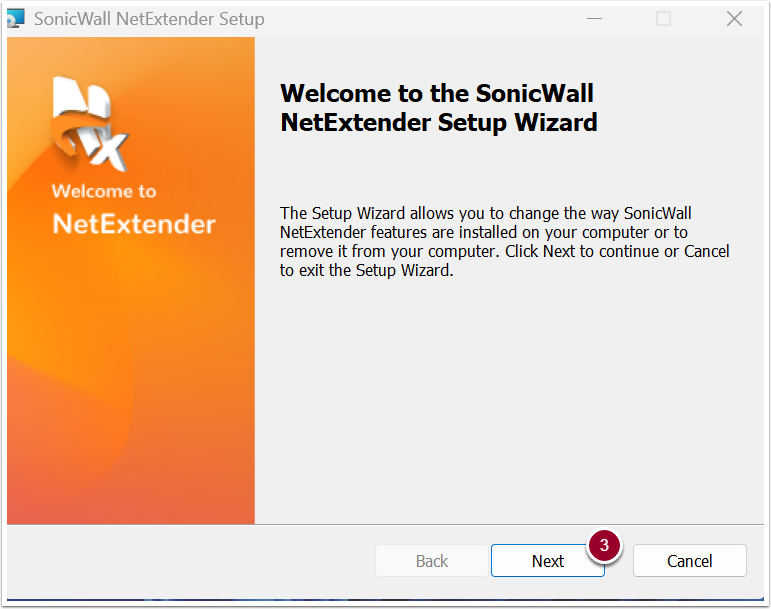
- A SonicWall NetExtender Setup window will appear. On the Welcome to the SonicWall NetExtender Setup Wizard message, click the Next button.
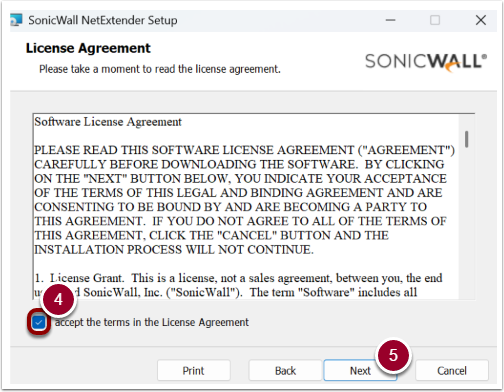
- License Agreement: Check the box next to I accept the terms in the License Agreement.
- Click Next button.
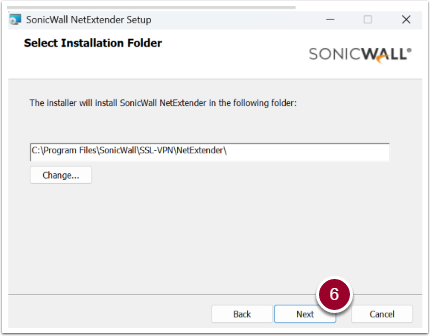
- Select Installation Folder: Click Next button.
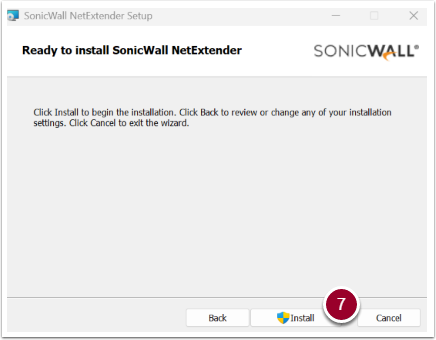
- Ready to install SonicWall NetExtender: Click Install button.
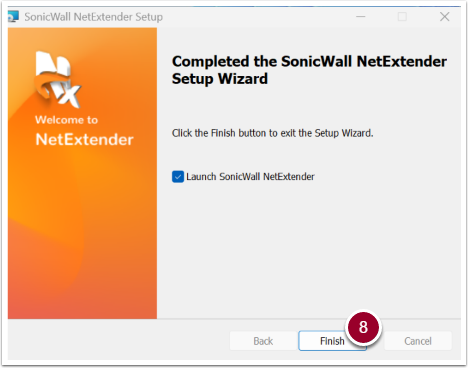
- Completed the SonicWall NetExtender Setup Wizard: Click Finish button.
Add Connection
- On the NetExtender Connection screen: Select Add Connection from the drop-down menu.
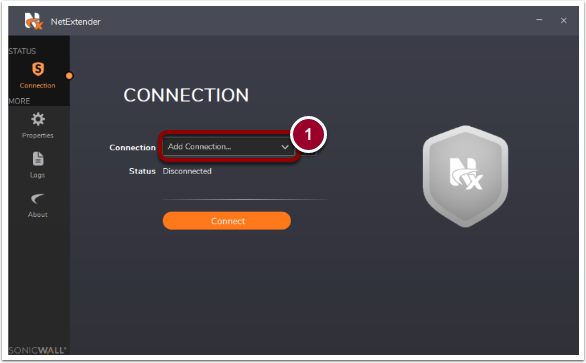
- In the Name field, enter
UIndy. In the Server field, enterremoteaccess.uindy.edu:5544 - Click Next button.

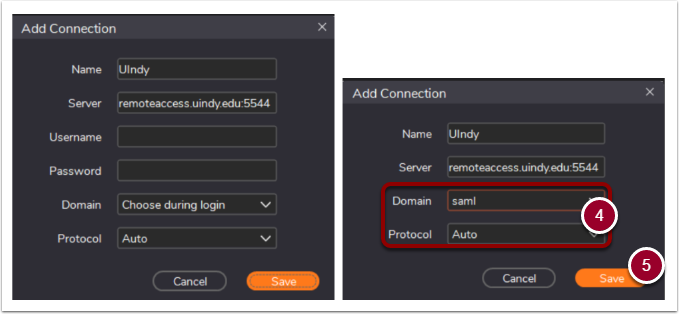
- Add Connection: Keep what's already entered. You don’t need to enter anything. For the Domain drop-down, select saml. For the Protocol drop-down menu will remain the same as Auto.
- Click the Save button.
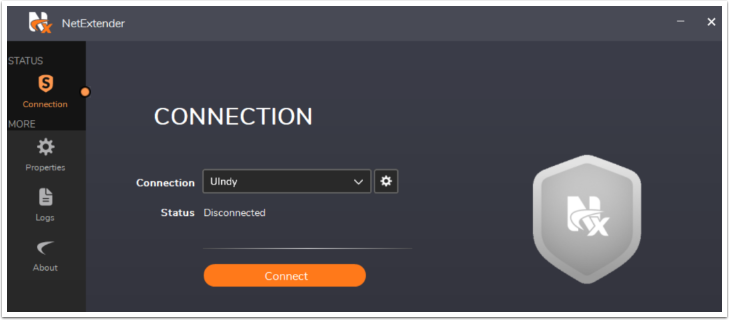
- This Connection Profile is saved for future use.
Download and install from MacOS
Mobile Connect is the VPN client for MacOS machines. MacOS and Windows machines deployed by UIndyIT should already have the client installed. To see if it's installed:
- Click the Spotlight (magnifying glass) icon in the menu bar and search for Mobile Connect. If nothing appears, proceed to Install the Mobile Connect Client. If Mobile Connect appears, skip to Add Connection.
Install the Mobile Connect Client
- Navigate to https://apps.apple.com/us/app/sonicwall-mobile-connect/id822514576?mt=12. This will direct you to the App Store.
- Click the Get button. The button will change to install. Click install.
- You may be prompted to enter your Apple ID password to authorize the download.
- Once the installation is complete, find and open SonicWall Mobile Connect from your Applications folder or Launchpad.
Add Connection
- Open the Mobile Connection application. Click the Connection dropdown menu (or look for an Add connection button/link).
- Select Add Connection.
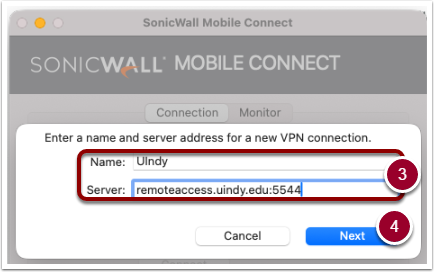
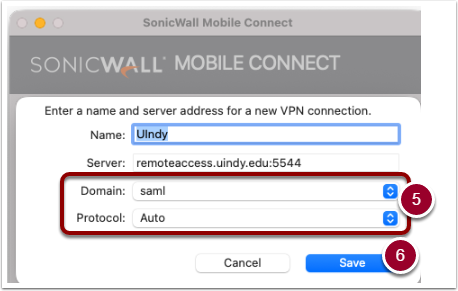
- In the Name field, enter
UIndy. In the Server field, enterremoteaccess.uindy.edu:5544 - Click the Next button.
- Keep what's already entered. You don’t need to enter anything. For the Domain drop-down, select saml. For the Protocol drop-down menu will remain the same as Auto.
- Click the Save button.
- If you receive a security warning about the server's certificate (which is common for new setups), you may need to Trust the certificate: Click Show Certificate. Locate the Trust disclosure triangle and expand it. In the When using this certificate: dropdown, select Always Trust. Click Continue. You will be prompted to enter your Mac's Administrator password to save the trust setting.
- This Connection Profile is saved for future use.