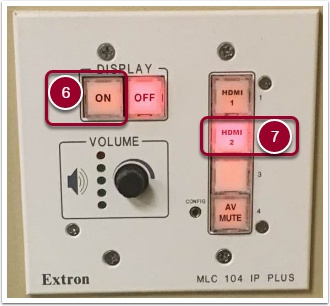
Some UIndy classrooms may be combined to form a larger space and will allow for projection to be combined as well. This article is designed to guide users through presenting in combined spaces.
Navigate to the following article for detailed instructions on how to Use projectors.
Understand general classroom technology
Project using an HDMI wired connection
- Connect a laptop using the HDMI cable (and, if needed, the appropriate adapter) that is provided.
- Press the ON button on the control panel to turn on and warm up the projector.
- Once the ON button light has stopped flashing, you may press the HDMI 1 or HDMI 2 button to project from your wired connection.
Please note: if your selection is already lit, you may need to press it again.
Audio
- Please be advised that you will have to wait until the ON button light on the control panel stops flashing.
- Audio may be adjusted at the wall plate. Turn volume dial up until the red light displays; then turn it back down to a satisfactory level.
Specific combined rooms at UIndy
Health Pavilion 380/382
In room 380 (the primary):
- If using the HDMI cable, connect the HDMI cable in the room to your laptop (if your laptop doesn't have an HDMI port, you'll need to provide the appropriate adapter). Make sure that the opposite end of the cable is plugged into one of the HDMI ports on the wall.
- Turn on your laptop.
- Press the ON button to turn on the projector and wait for the ON button light to stop blinking.
- Press the relevant source option:
- Press the HDMI button on the control panel that correlates with the numbered port on the input wall plate to which the HDMI cord is connected (e.g. HDMI 1) for a wired connection.
- Image on the laptop will project on the screen.
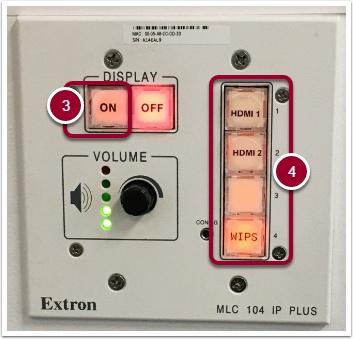
After everything is projecting in room 380, in room 382*:
- Press the ON button to turn on the projector and wait for the ON button light to stop blinking.
- Press the 3rd button on the control panel if an image doesn't appear on the projector screen after the projector has warmed up. Please note: buttons 1, 2, and 4 on the control panel should not be pressed since they aren't connected to anything and may disrupt use of the system overall.
- Image from room 380 will project to the screen in room 382.
*Room 382 can only be used as a secondary projection room to room 380. You must connect in Room 380 first and then combine 382 with 380 using the instructions above.
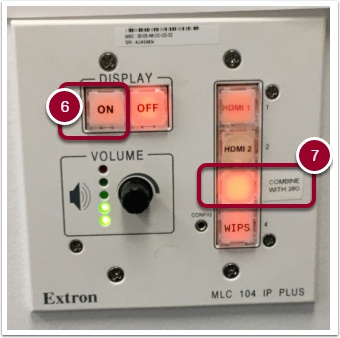
Athletics & Recreation Center (ARC) 104/105/106
In room 105 (the primary):
- Connect your laptop to the HDMI cable plugged into HDMI 2 input.
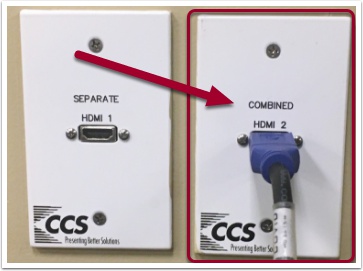
- Turn on your laptop.
- Turn on the projector and wait for the ON button light to stop blinking.
- Press the HDMI 2 button on the control panel.
- The image on the laptop will project on the screen.
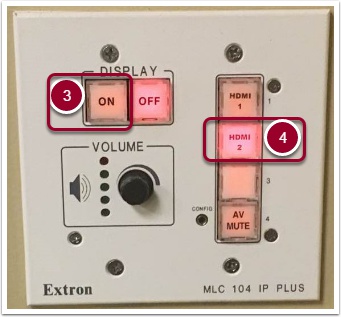
After everything is projecting in room 105, in rooms 104 and 106:
- Press the ON button to turn on the projector and wait for the ON button light to stop blinking.
- Press the HDMI 2 button on the control panels in each room.
- The image from room 105 will project to the screen in rooms 104 and 106.